How to Manage Sitemaps in Bing Webmaster Tools
John / 23 Sep 2023
An XML sitemap is a structured text file that contains a list of URLs for all the important pages on your website.
XML stands for "Extensible Markup Language," which is a format designed to store data in a structured manner.
The XML sitemap serves as a roadmap for search engine crawlers, helping them understand your website's structure and content for more efficient crawling.
It can help search engines find and index all of your website's pages, even if they are not linked to from other pages. This can help improve your website's visibility in search results, driving more traffic to your website.
How to add a sitemap in Bing Webmaster Tools
You need to first create an XML sitemap with all the important URLs and upload it to your website's root folder. The URL to your sitemap should be something like: https://www.yourwebsite.com/sitemap.xml.
To add the sitemap for your website in Bing Webmaster Tools, follow these steps:
Step 1: Log in to Bing Webmaster Tools
Visit https://www.bing.com/webmasters and sign in to your account.
Step 2: Select the website
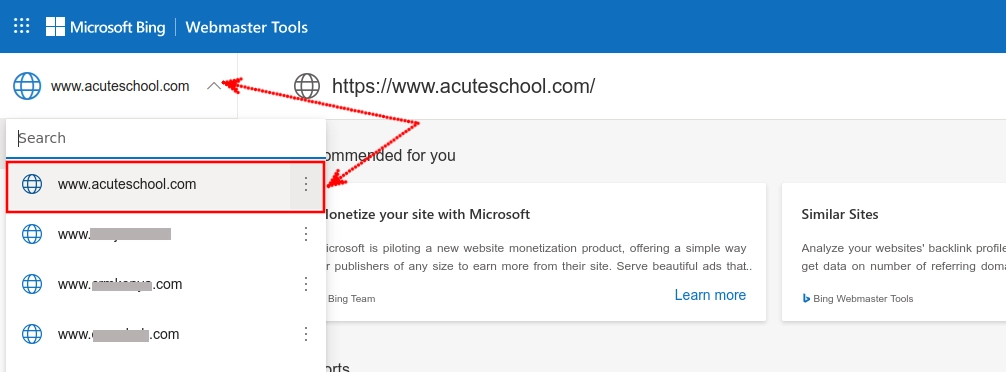
If you have more than one website in your Bing Webmaster Tools account, select the website you want to add the sitemap to. You can do so through the dropdown select options at the top-left corner.
Step 3: Navigate to the Sitemaps page
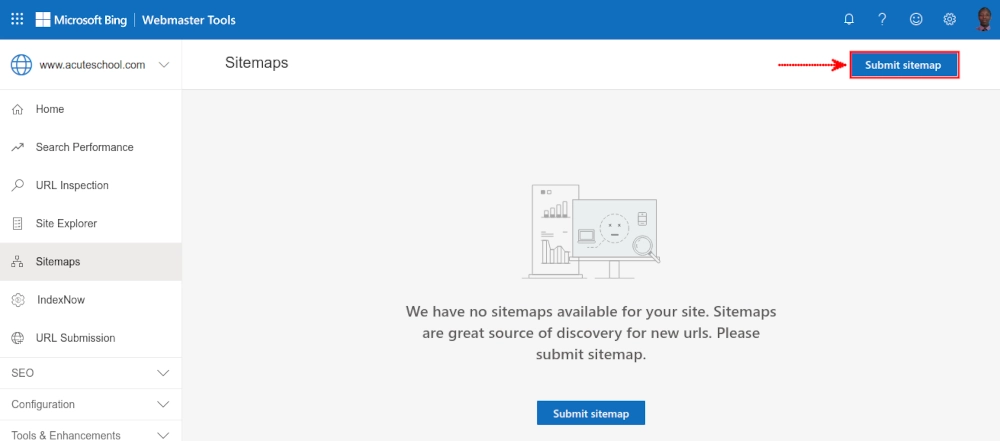
Click on the "Sitemaps" option in the left navigation menu.
Step 4: Add a Sitemap
Click on the "Submit sitemap" button at the top-right side.
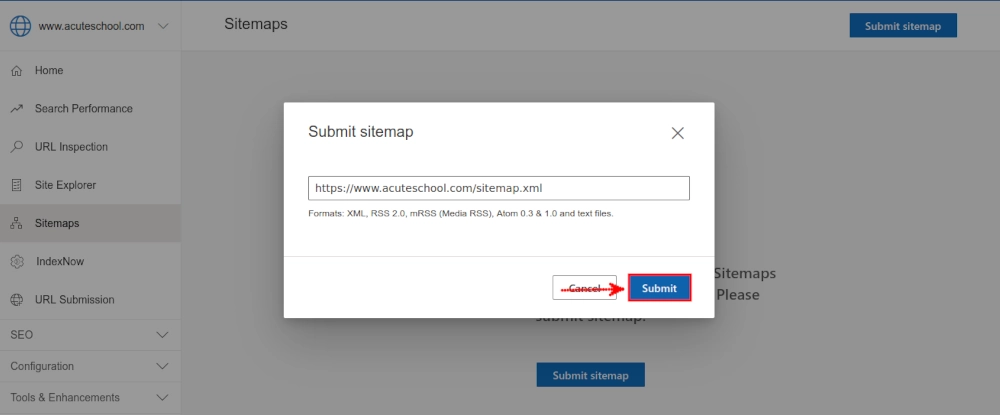
A pop-up modal will open up, requiring you to enter the URL of the sitemap file. Enter and then click on the "Submit" button.
If your sitemap is valid, you will receive a success message and it will be added to the list of sitemaps for your website.
Bing will now process your sitemap and begin crawling your website accordingly. You can also check the status and error reports for your sitemaps in this section.

If you already have your website's sitemap added in Bing Webmaster but have made changes to it, just click on the three dots menu in its right column and then on the "Re-submit" option.

How to remove a sitemap in Bing Webmaster Tools
If you need to remove a sitemap in Bing Webmaster Tools for any reason, follow these steps:
Step 1: Access the website's Sitemaps page
When logged into your Bing Webmaster Tools account, select the website whose sitemap you want to remove and click on the "Sitemaps" option in the left menu.
Step 2: Select the Sitemap
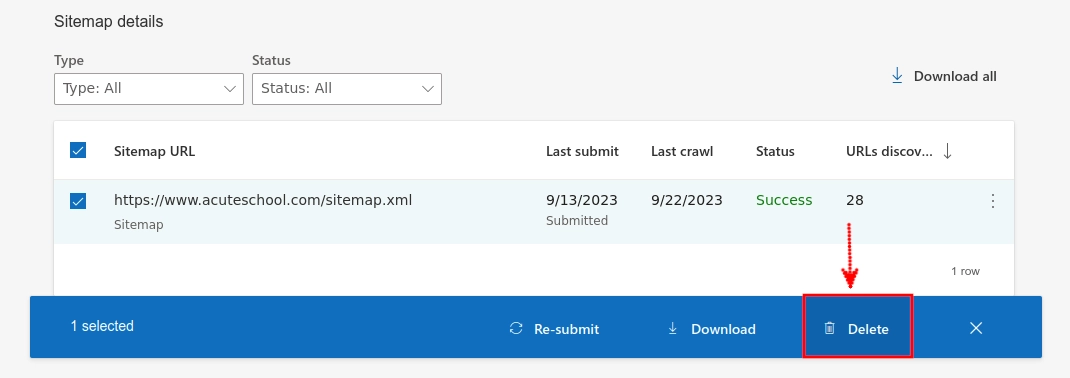
In the "Sitemap details" section of the "Sitemaps" page, hover the cursor over the sitemap that you want to delete and select it by clicking on the checkbox in the left column of the record.

Step 3: Delete the Sitemap
On selecting a sitemap, several options will appear at the bottom of the page. Click on the "Delete" option to remove it.
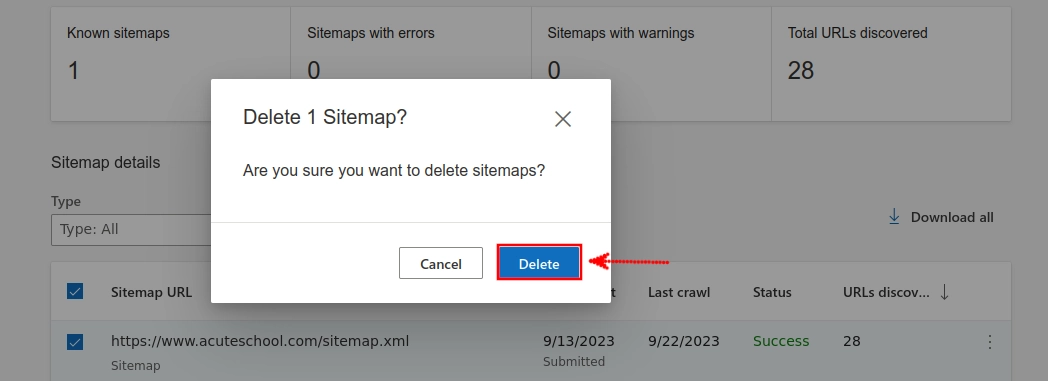
A pop-up modal will open up, requiring your confirmation of this action. If you are sure and want to go ahead and delete the sitemap, click on the "Delete" button.
Additional Tips About Sitemaps
You can use a sitemap generator to help you create an XML sitemap for your website.
Keep your sitemaps up to date. When you add or remove pages from your website, be sure to update your sitemap files accordingly.
You should submit your sitemap to Bing Webmaster Tools (and Google Search Console) after you make any major changes to the sitemap file or your website.
Monitor your sitemap's performance in Bing Webmaster Tools and address any crawl errors promptly.
You can create separate sitemaps for different sections of your website for better organization.
Conclusion
Managing sitemaps in Bing Webmaster Tools is a simple but fundamental aspect of SEO that can significantly improve your website's visibility on Bing's search engine results.
By following the steps in this article, you can add, remove, or update (re-submit) sitemaps efficiently, ensuring that they are valid and up-to-date, and that search engine crawlers can navigate and index your site effectively.
