How to exclude your IP address from Microsoft Clarity statistics
John / Updated on 04 Nov 2023
Microsoft Clarity is a free-to-use website traffic and behavioral analysis tool that helps website managers improve their website experiences by better understanding user interaction and behavior on the website.
It is very easy to integrate into your website and use.
Microsoft Clarity provides a wide array of important data on website visits and usage. For more details on how it works, here is an article I wrote on what Microsoft Clarity is and how to install it on your website.
As a website owner, you are probably the most frequent visitor to the site. This happens as you have to keep checking it regularly to confirm that it is up and running, the content is correct and up-to-date.
Over time, your visits and page views may accumulate to large numbers and create a false impression on the overall website traffic and user behavior.
I am sure you would want to have as accurate information for your website traffic as possible. Microsoft Clarity allows you to filter out your IP address from showing in the statistics. You can also block the IP addresses of people close to you such as family members, work colleagues, employees, friends, etc.
This way, you can rest assured of the accuracy of the analytics.
In this article, I will take you through a step-by-step process of excluding specific IP addresses from Microsoft Clarity analytics.
Blocking an IP address from Microsoft Clarity tracking
Before blocking an IP address or a set of addresses, you first need to know how to identify the IP address(es) to block.
Identifying the IP address(es) to block
If you want to check your Ip address, you can easily check it by:
Visiting ping.eu

Visiting whatismyipaddress.com

Another method is simply to Google "my IP".

This may show a slightly different IP address from the above websites. Take note of it for you will need to block it as well if it.
You may ask any other person whose visits to the website you don't want to be recorded and shown in the Clarity metrics to check and provide you with their IP address(es). In case you share with them a local network such as an office or home Wi-Fi, you basically share the same IP address.
You can also ask your ISP to share the IP address allocated to you.
Now that you know how to identify the IP addresses to block, let's dive into blocking.
How to block an IP address in Microsoft Clarity
Step 1: Log in to your Microsoft Clarity account. You will see a list of all your projects/websites. Click on the gear/settings icon of the project you want to do exclusion. Alternatively, if the project is already open, you just have to navigate to the "Settings tab".

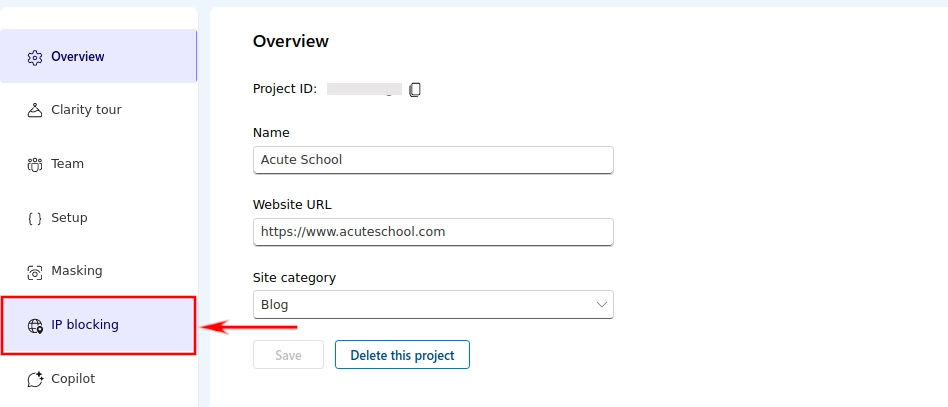
Step 2: Click on the "IP blocking" link on the left side.
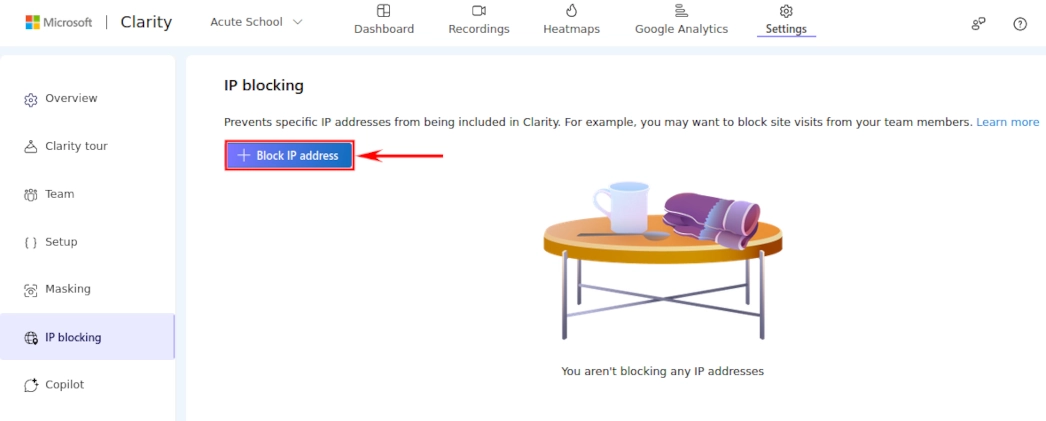
Step 3: Click on the "+ Block IP address" button.
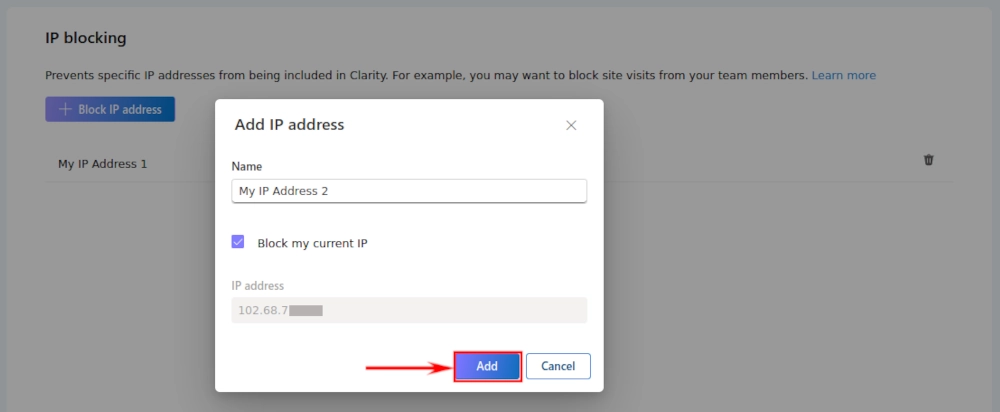
Step 4: Enter the IP address you wish to block in the "IP Address" field and give it a name in the "Name" field to easily identify it then click the "Add" button.
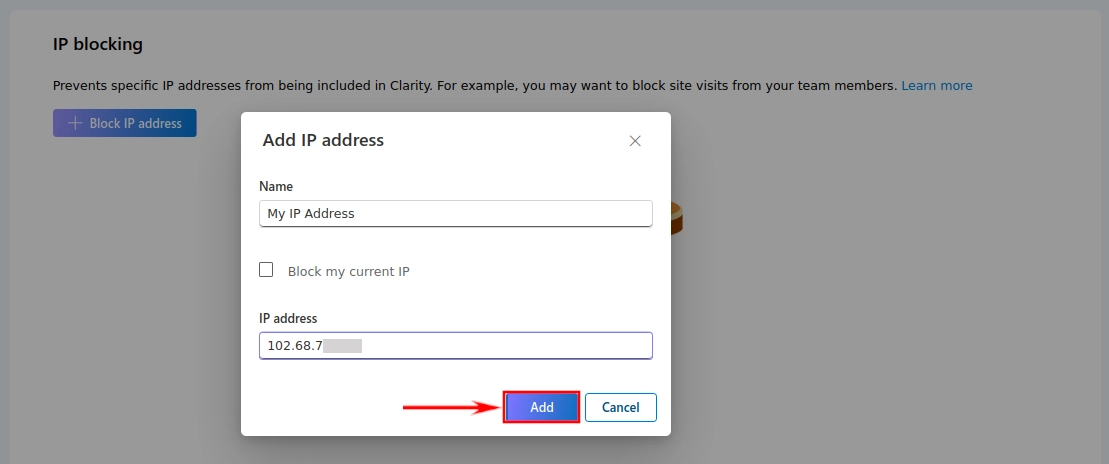
Alternatively, you can block the IP address you are currently using directly by letting Clarity add it automatically. All you have to do it to check the "Block my current IP" box and the "IP Address" field will be filled. Same as when doing it manually, give that IP address any name you wish to give it in the "Name" field then click the "Add" button.
That's all! The current analytics and the recordings for the IP address(es) will remain but no new statistics will be shown for them again.
All the blocked IP addresses will be listed on the IP blocking page as below.

You can block as many IP addresses as you would wish.
If for some reason you would want to remove an IP address from blocking on Clarity, you can easily do so by clicking on the trash can icon on the right-hand side of the IP address. You will be prompted as below.

Click on the "Remove" button and the IP address will be removed from the block list.
Conclusion
Microsoft Clarity is a free and easy-to-use website traffic and user behavioral analytics tool. It allows you to see a lot of statistics about your website usage.
Seeing your website traffic as a website owner brings a lot of joy. For obvious reasons, as the website owner, you are always a frequent visitor to your website. Just like other website visitors, your visits and website usage data are recorded and presented among other users' data in the analytics.
To have accurate results, you won't want your visits and those of people close to you such as family members, employees, work colleagues, friends, etc. to be recorded and shown in the metrics. Clarity allows you to filter out and exclude such in the reporting.
In this article, you have learned through an easy-to-follow, step-by-step procedure, how to exclude your IP address and those of people close to you from web analytics reports on Microsoft Clarity.
