How to Grant Access to Microsoft Clarity
John / 18 Oct 2023
Microsoft Clarity is a web analytics tool that helps website owners gain valuable insights into user behavior and interactions on their websites.
As the website owner or administrator, you may for various reasons need to grant access to a website's data to another individual on Microsoft Clarity. That's, enabling them to access the data from their own accounts without having to share your account login credentials.
In this article, I'll walk you through the step-by-step process of granting access to website data on Microsoft Clarity.
Access Roles in Microsoft Clarity
In Microsoft Clarity, there are two types of roles for team members:
- Admin: An Admin has full access to the project. They can view all data, edit project settings, add and remove team members, and change roles.
- Team member: A Team member has access to all project data but cannot change settings or manage other team members.
The role that you assign to your team members will depend on their needs and responsibilities.
If you need the person to be able to manage the project or other team members, then you should assign them the Admin role. Otherwise, assign them the Team member role.
Granting Access in Microsoft Clarity
To grant access to a project (website) in Microsoft Clarity, you must have the admin role in the project that you want to share.
Follow these steps:
Step 1: Log in to your Microsoft Clarity account via https://clarity.microsoft.com.
On logging in, you will be directed to the Clarity dashboard. Here, you can see your projects.
Step 2: Click on the team icon of the project to which you want to grant access.

Alternatively, you can open the project, navigate to the Settings tab at the top, and then cllick on the "Team" option in the left-side menu.
Step 3: On the Team page, click on the "+ Add team member" button.

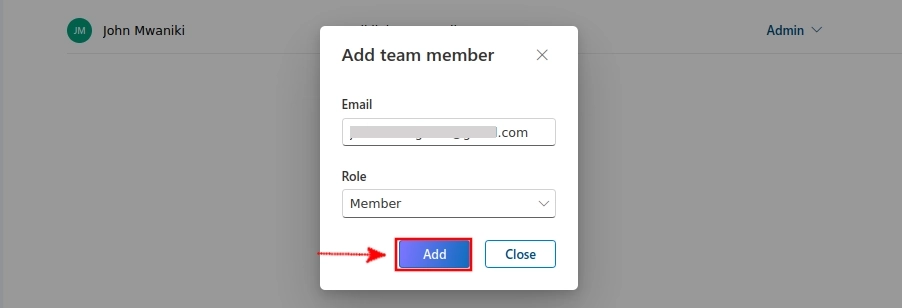
Step 4: Enter the email address of the person you want to grant access to the project with. Select the role that you want to grant them and click on the "Add" button.

Accepting Invitation
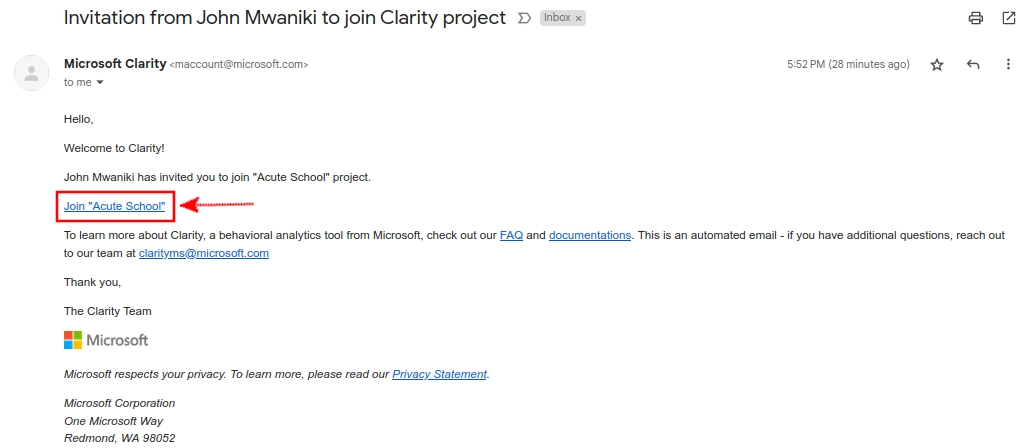
Once added to the team on Microsoft Clarity by the admin, you will receive an email invitation. Click on the link in the email to accept the invitation.

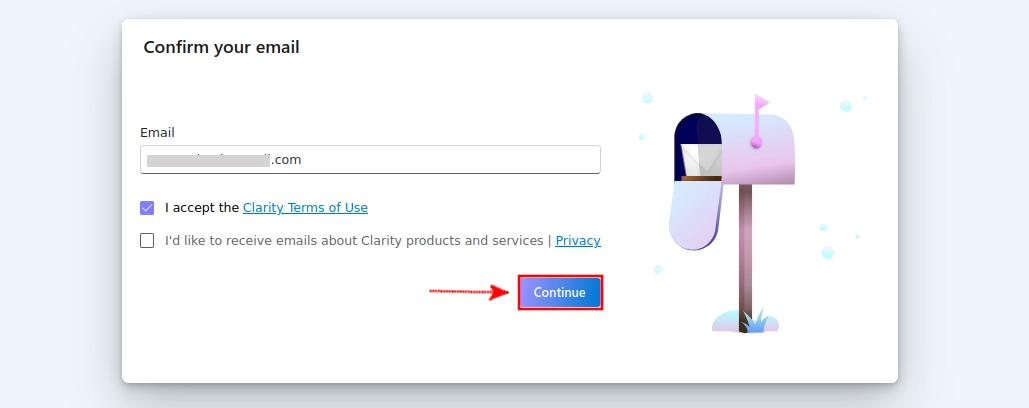
You may be prompted to log in with your Microsoft account if you aren't already logged in. If you are accessing Microsoft Clarity for the first time using that email, you will be taken to email confirmation page where you will be required to accept Clarity terms of use. Then click on the "Continue" button.

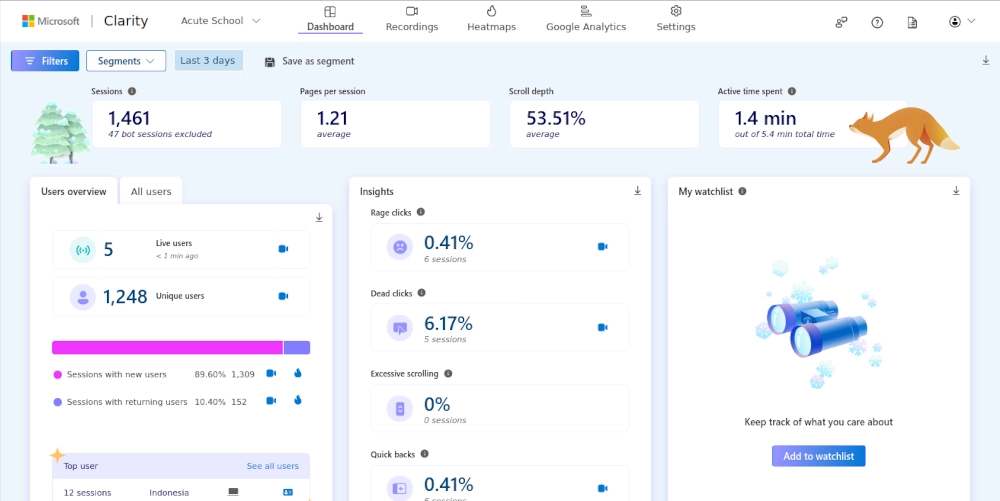
Else, you will be taken directly to the dashboard page of the project in the Clarity account.

How to Manage Access in Microsoft Clarity
Once you have granted access to a project in Microsoft Clarity, you can manage it at any time (i.e, change their roles or revoke their access). To do this, go to the Team page as described in steps 1 and 2.
There you will see a list of all of the team members that have access to the project.
To change a member role, simply click on the role for that member in the table and select the new role that you want to grant them from the drop-down menu.

To revoke a member access from the project, click on the "Remove" button for that member in the table.

You will be prompted to confirm your action. Click on the "Yes, remove" to confirm that you want to remove the user from the project.

The user's access will be revoked and the entry removed from the Team page.
